Updated 20th April 2026
Fermentation 101: A beginner’s guide


Share this article


Fermentation is a natural process where microbes break down sugars to preserve food, boost flavor, and make nutrients easier for your body to absorb.
Probiotic-rich foods like kimchi and kefir increase microbiome diversity, which can improve mood, energy, and immunity.
You can easily ferment at home using salt and water. Start with small portions to let your gut adjust.
You may have heard that fermented foods help support gut health and that it’s simple to ferment at home. But are you nervous about trying it for yourself?
Below, fermentation expert Kenji Morimoto shares his simple guide to fermenting almost any plant. But first …
Who’s Kenji?
Kenji Morimoto, also known as @kenjcooks, is a fourth-generation Japanese American based in London. He’s a content creator, recipe developer, and food writer.
As a child, he was in charge of making tsukemono — Japanese pickles — for family gatherings. And his love of fermented food lives on.
During the pandemic, he started an Instagram account to explore and share his interest in fermentation.
Since then, he’s cooked in kitchens in Poland with a focus on fermented food, run supper clubs, and led workshops on kimchi and koji. Now, he’s sharing his knowledge with us.


Our new app gives you the power to see beyond the marketing
Make smarter, science-backed food choices in seconds. Scan. Score. Reveal the truth.
Fermenting 101
Fermenting is all the rage. You like the zingy flavors, know about the health benefits, and want to empower yourself to ferment. But how do you do this safely in the comfort of your kitchen?
In this how-to guide, I’ll explore the basics of dry brining lacto-fermentation to kick-start your confidence and gut health.
You can use the dry brining process for all varieties of cabbage, as well as any other veggies with a high water content, like shredded carrots and beets, fennel, and onion.
But if you want to ferment vegetables that are left whole or have less water content, another method of lacto-fermentation, called “wet brining,” shines best.
We’ll explore that technique further down.
What’s dry brining lacto-fermentation?
In lacto-fermentation, you preserve produce in a salty brine. The salt content makes the environment inhospitable to unwanted bacteria but allows the growth of Lactobacillus bacteria.
These bacteria convert the sugars naturally present in the produce into lactic acid.
Lactic acid acts as a preserving agent, creating an environment that safely preserves the produce and gives the end product its delicious flavor.
It’s called dry brining because you create the brine from the vegetable itself. In other words, you don’t need to add water.
This differs from wet brining, where you add a saltwater solution to the food, and we’ll come on to that at the end.
Sauerkraut is a good example of dry brining lacto-fermentation.
Making sauerkraut
This is all you need:
a jar
salt
cabbage
How much salt?
The key here is the proportion of salt: I generally go for 2% salt of the total weight of the cabbage (once it’s chopped up).
So, if the total weight of your cabbage is 600 grams, you multiply this amount by 0.02, which means you’ll need 12 g of salt.
1. Chop and massage your cabbage


Chop your cabbage and sprinkle on the salt. Then, give it a good massage with your hands.
As you massage it, brine is extracted from the cell walls, which allows the correct environment for lacto-fermentation, or lactic acid formation.
The goal is to optimize surface area, so if you chop the cabbage thinner, more brine will be created as you massage the cabbage with the abrasive salt.
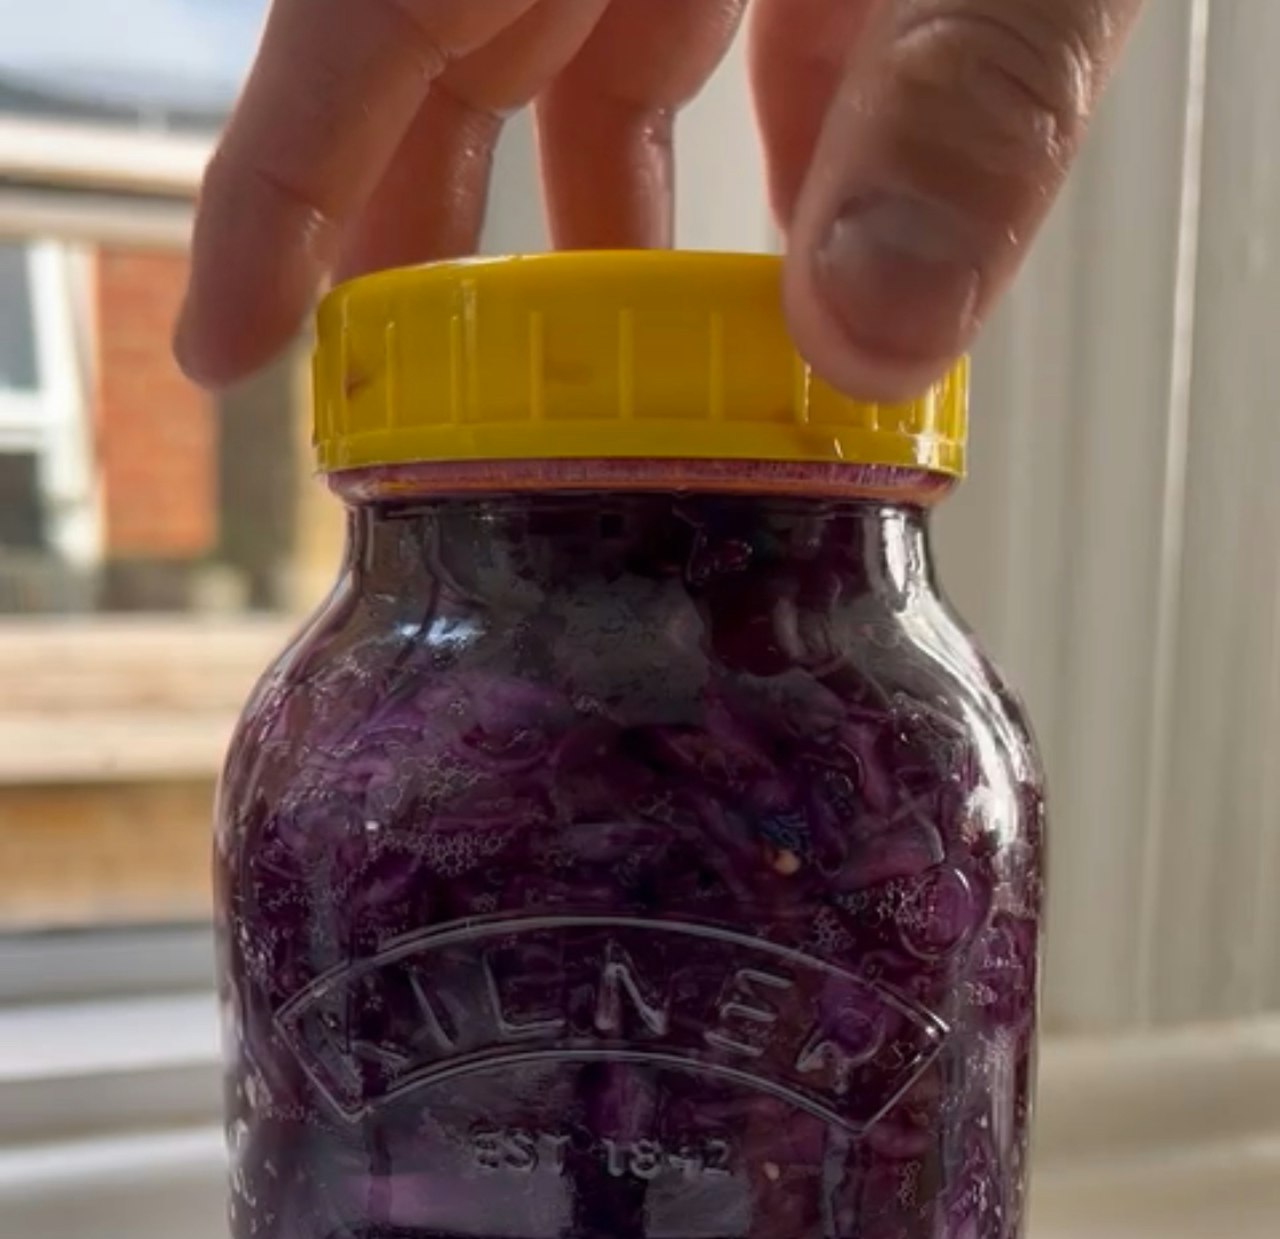
2. Add to your jar


After massaging, put the cabbage into your jar of choice using a wooden spoon to pack it tight.
Lacto-fermentation is anaerobic, which means it won’t happen in the presence of oxygen. So, keeping all the cabbage below the brine, away from the air, is important.
You can do this with a food-safe pickle weight, but my favorite solution is a large cabbage leaf that acts as a barrier for your sauerkraut.
Remember, anything that’s exposed to oxygen has the potential to harbor unwanted yeast and bacteria and lead to spoilage.
3. Burp your jars

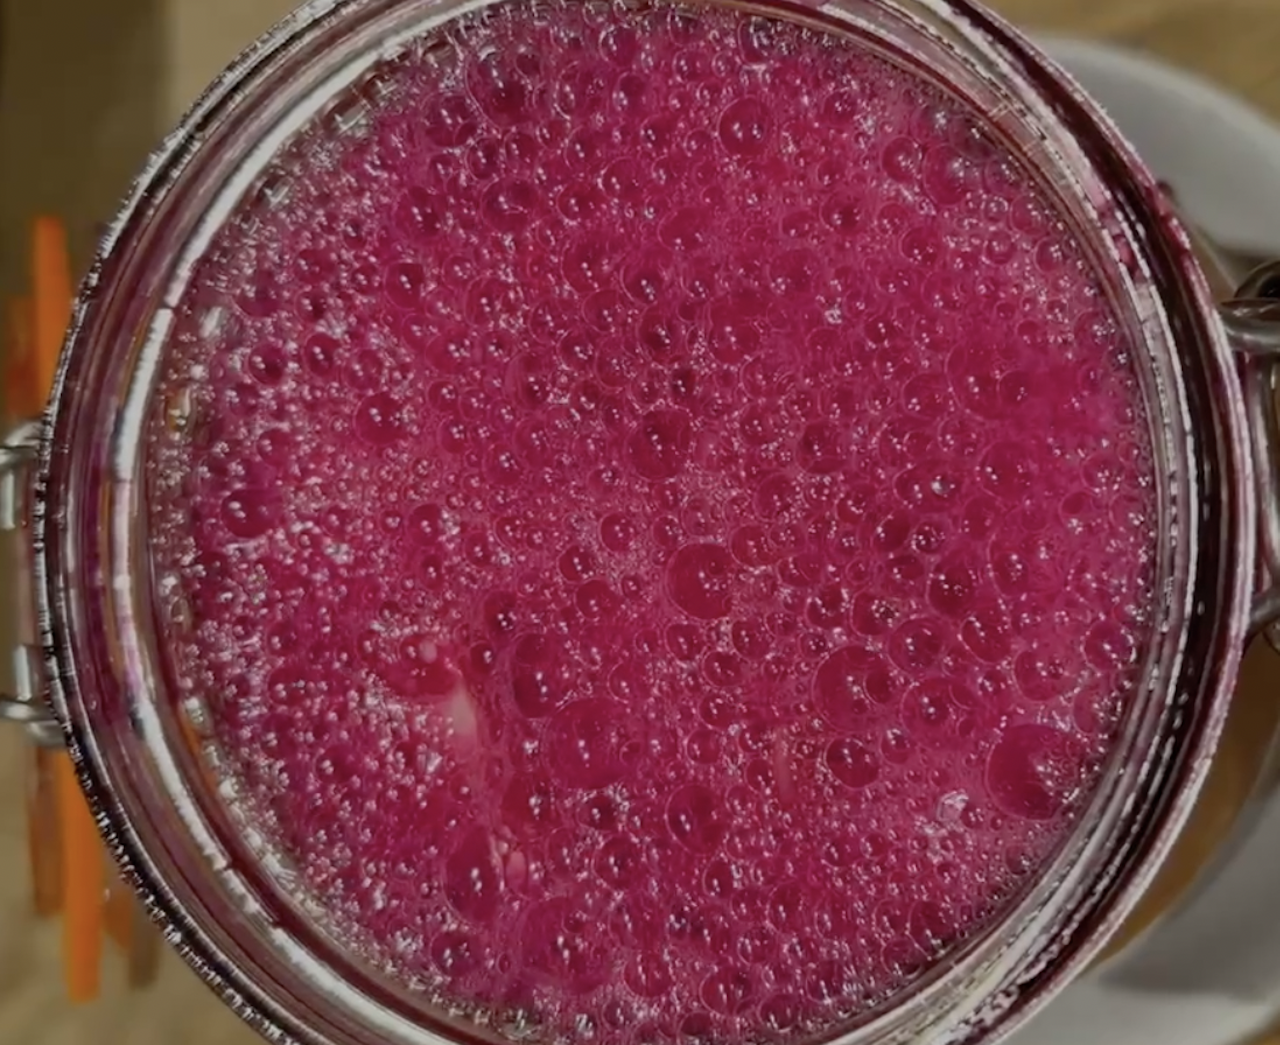
Over the coming days, you should notice a lot of bubbles, so it’s important to burp your jars by opening them every so often, or by keeping them slightly loose.
This goal is to allow excess gas and overflowing brine to escape.
Pro tip: Keep the jars on a dish to minimize the mess.
4. Then wait and taste

The speed at which your sauerkraut ferments depends on many factors, including the temperature of your home.
It’ll ferment faster in warmer environments, but I generally like to ferment it at room temperature for a minimum of 2 weeks before consuming it.
As with most things, pay attention to your senses: What does it taste like? How does it smell?
5. Move to your fridge
When you’re pleased with the product, move it to the fridge to slow down the fermentation process.
But feel free to continue fermenting it at room temperature until it reaches your desired flavor.
Given the importance of the microbial health of what you’ve fermented, make sure you use clean utensils every time, and keep everything below the brine.

We don't buy the hype — and neither should you
Our new app reveals what the food labels won't, using data from the world's largest nutrition study run by ZOE.
Wet brining
If you want to ferment whole vegetables or vegetables that contain less water, wet brining is best.
Some classic examples of wet brining are lacto-fermented cherry tomatoes, carrot sticks, or whole chili peppers for your next hot sauce.
Here, the main difference is: Instead of massaging the veggies with salt to create the brine, you add salt and water.
Again, you need the right amount of salt. But rather than the salt being a percentage of the weight of the vegetables, with wet brining, it’s a percentage of the weight of the water you use.
This can range from 2–5% salt. So, for example, if you’re using a 1-liter jar, the amount of salt could vary from 20–50 g.
Again, this is an anaerobic process, so make sure that whatever you’re fermenting remains submerged in the brine.
And feel free to experiment. Based on your own preferences, you can add any additional flavors. Good luck!
If you'd like to know more about fermented food, this ZOE article has nine of the best fermented foods to include in your diet. And this ZOE Podcast covers why it's not only safe but beneficial to eat fermented foods:
FAQs
What is the easiest fermented food to make at home?
Saurkraut is a good starting point for beginners. You can use the dry brining process for all varieties of cabbage, as well as any other veggies with a high water content, like shredded carrots and beets, fennel, and onion.
Are fermented foods good for GERD?
Currently, the evidence for this is not conclusive. Fermented foods can improve gut health, but high-acid fermented items may actually worsen symptoms for some people.
What are the top 5 fermented foods?
Yogurt, kefir, sauerkraut, miso, and kombucha are all good options, but check the labels of store-bought versions for additives and high sugar content. It's also best to choose products that contain live cultures.


